This guide describes the implementation of a microprocessor-based CAN bridge positioned between the Battery Monitoring Unit (BMU) and the Electric Vehicle Electronic Control Unit (EV-ECU). The system intercepts and modifies CAN packets to allow the vehicle to accept an expanded battery pack, report state of charge accurately, and fully utilize the increased capacity.
Software Implementation
The CANFDuino was programmed using a custom adaptation of an existing Arduino sketch (referenced as Arduino_19.ino). The modified version, named MITM_19.ino, maintains core functionality while enabling compatibility with the hardware setup. This code has been operational in the vehicle since August 2024.
Compilation and uploading of MITM_19.ino follow standard Arduino development procedures. For detailed instructions, consult the CANFDuino product documentation (e.g., “How To” guides or resources listed on the manufacturer’s website).
Hardware Setup
Vehicle-specific component locations and wiring should be verified using the appropriate service manual.
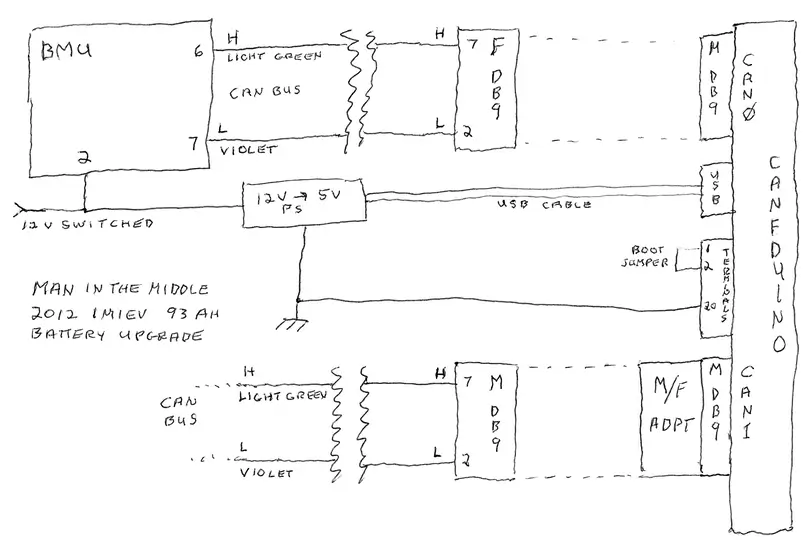
The CANFDuino was configured with the following external connections:
• Terminal 12: Connected to the internal “GND” pad (chassis ground).
• Terminals 1–2: Wired to the internal “NO BOOT” pads.
• Jumpered for normal fast-boot operation.
• Opened when uploading new firmware.
• Micro USB: Provides 5 V power or interfaces with a computer for programming.
• CAN0: DB9 connector linked to the BMU, with internal termination.
• CAN1: DB9 connector linked to the vehicle CAN bus, without internal termination. A gender changer is used to convert this to a female DB9 port.
The vehicle’s CAN bus was disconnected near the BMU. Two short cables (approximately 6 inches each) were installed:
• One from the BMU side, ending in a female DB9 connector.
• One from the bus side, ending in a male DB9 connector.
These allow reconnection to bypass the CANFDuino if needed.
A switched 12 V supply from the BMU circuit powers a DC-DC buck converter, which provides 5 V to the CANFDuino via the Micro USB port whenever the BMU is active.
Terminal 12 of the CANFDuino is also bonded to the vehicle chassis ground.
Wiring Diagrams
Refer to the accompanying schematics for detailed interconnection and pinout information.
1.CAN Bridge Wiring Schematic (Generic Implementation)
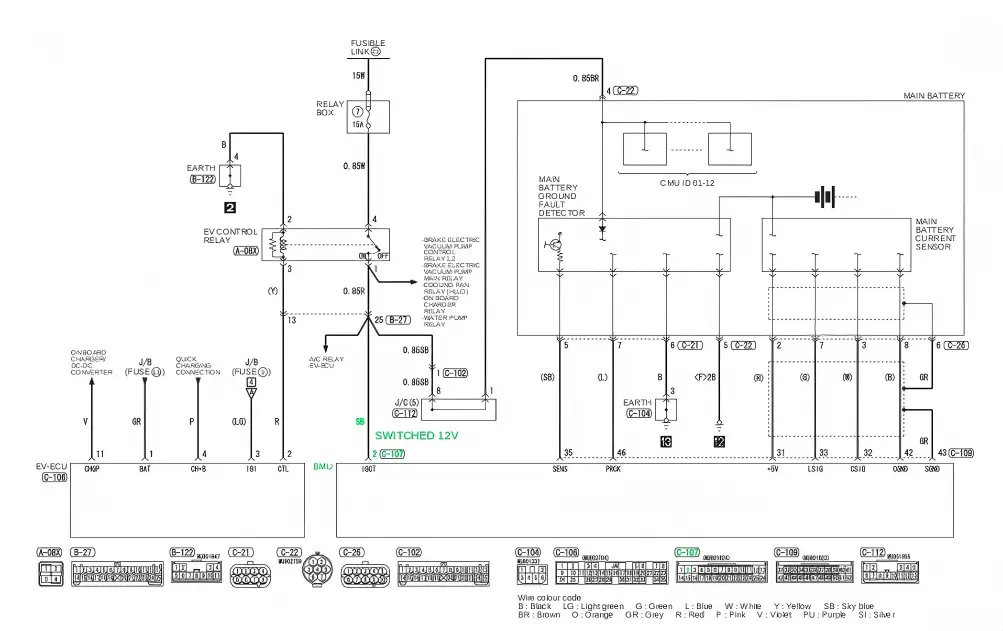
2.Vehicle wiring diagram showing the 12V switched power line (marked in green). The actual wire color in the vehicle was yellow, not the light blue indicated in the schematic.
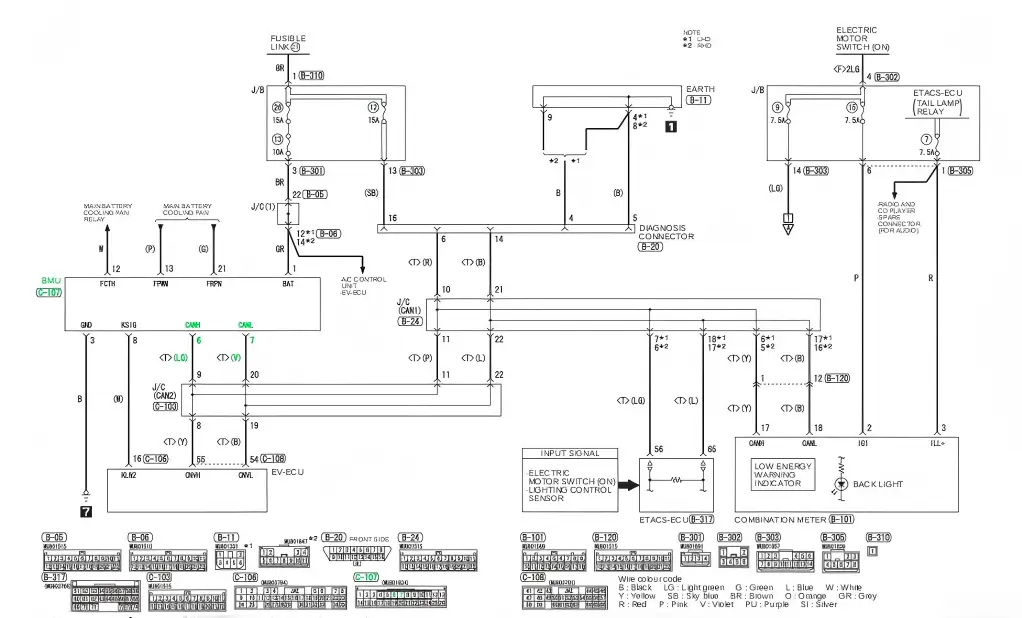
3.Vehicle wiring diagram indicating the BMU CAN bus connections (marked in green).
Pictures
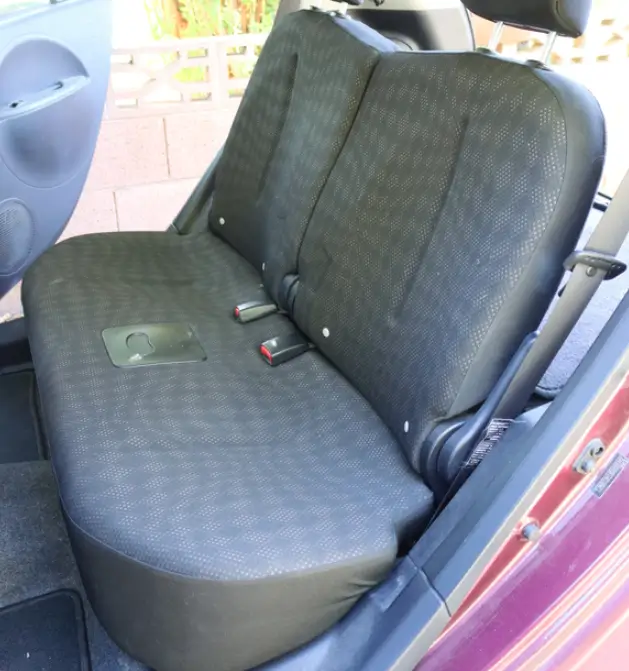
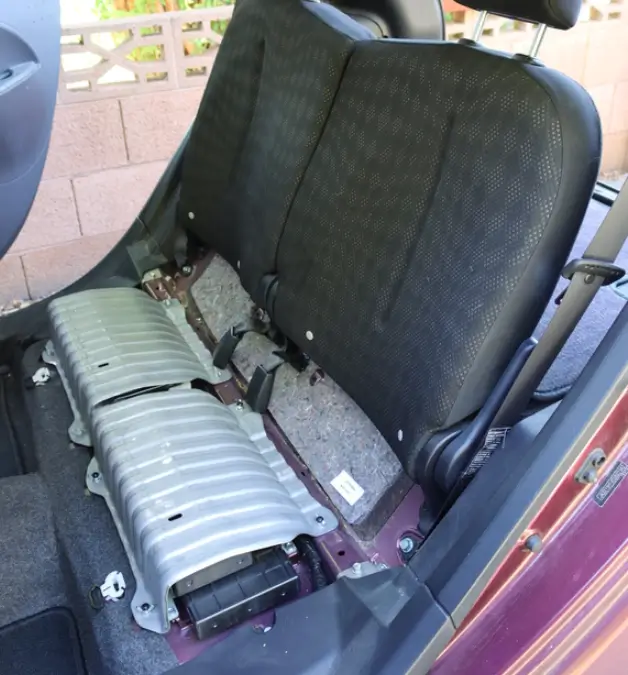
1.The Battery Management Unit (BMU) is positioned beneath the left side of the rear seat cushion. Access requires removing the cushion, typically by lifting its front edge upward to release the retention clips.
2.After the rear seat cushion is taken out, the Battery Management Unit (BMU) is located under the cover on the left side.
3.Cover is now off.
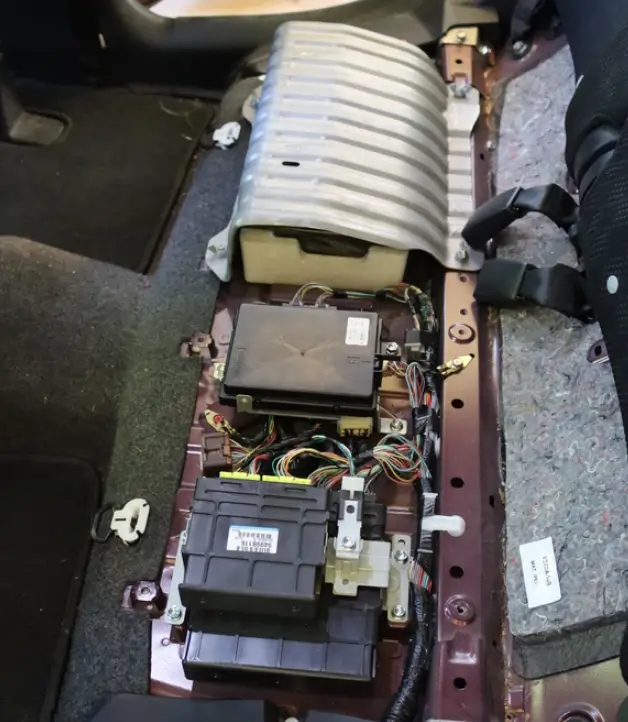
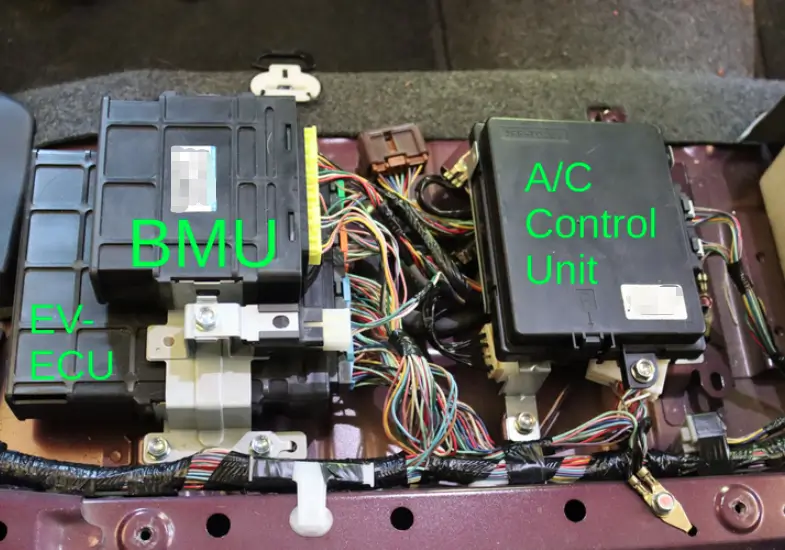
4.BMU Installation Position
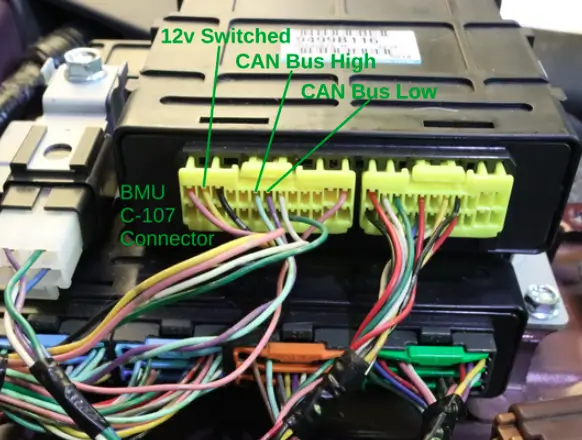
5.BMU C-107 connector wiring details: pin 2 (12V switched, yellow), pin 6 (CAN_H, light green), pin 7 (CAN_L, violet).
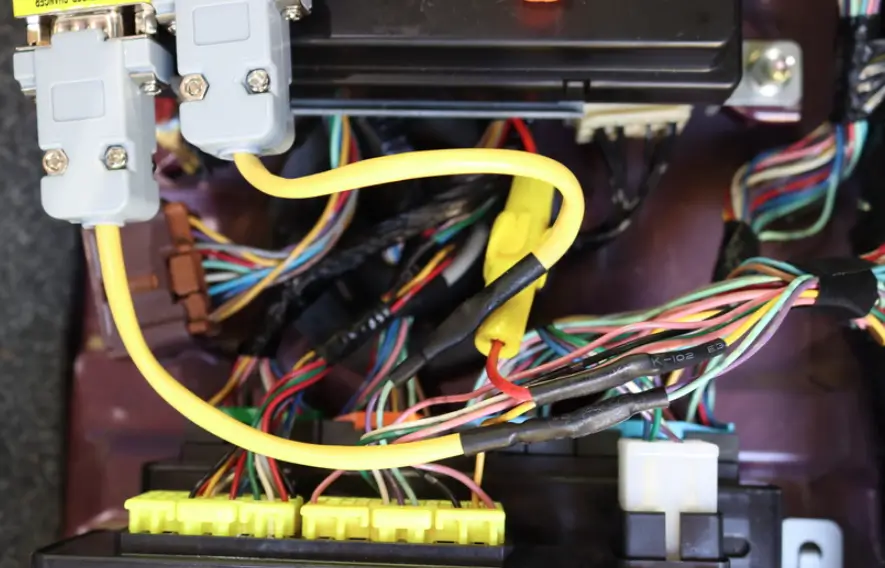
6.CAN bus connections (light green and violet wires) have been cut, with DB9 pigtails spliced into the circuit. The USB power supply is connected to the switched 12V source (yellow wire), and an inline fuse is installed on the USB power line.
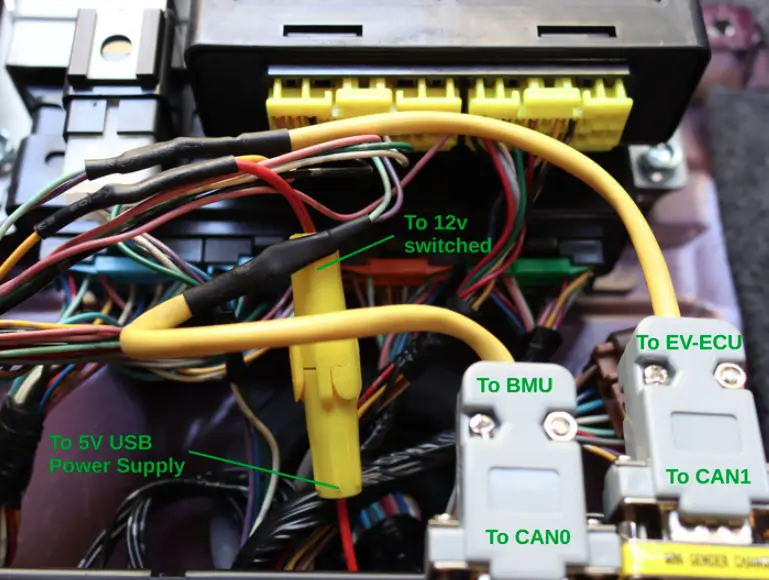
7.Alternate wiring perspective for improved clarity.
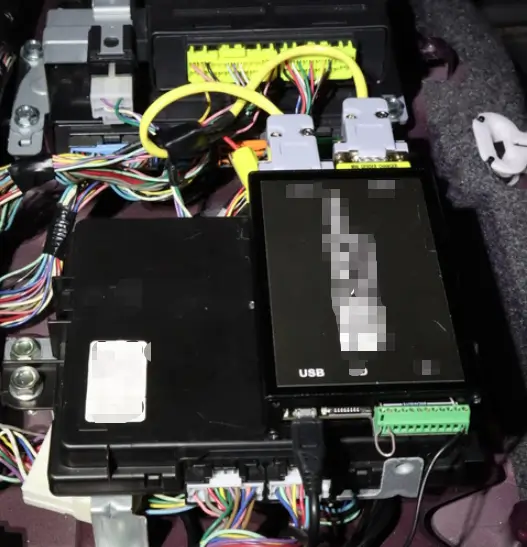
8.CANFDuino unit installed with hook-and-loop fasteners to the A/C Control Unit, utilizing available space. The USB power supply (not shown) is mounted beneath the A/C Control Unit.
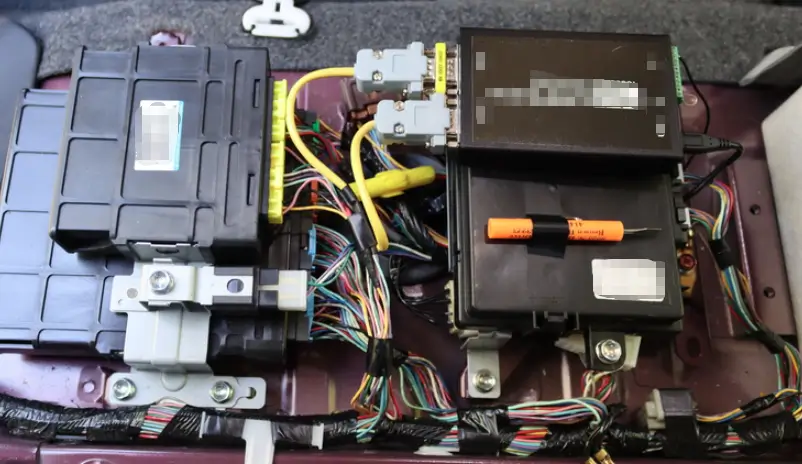
9.Completed installation.
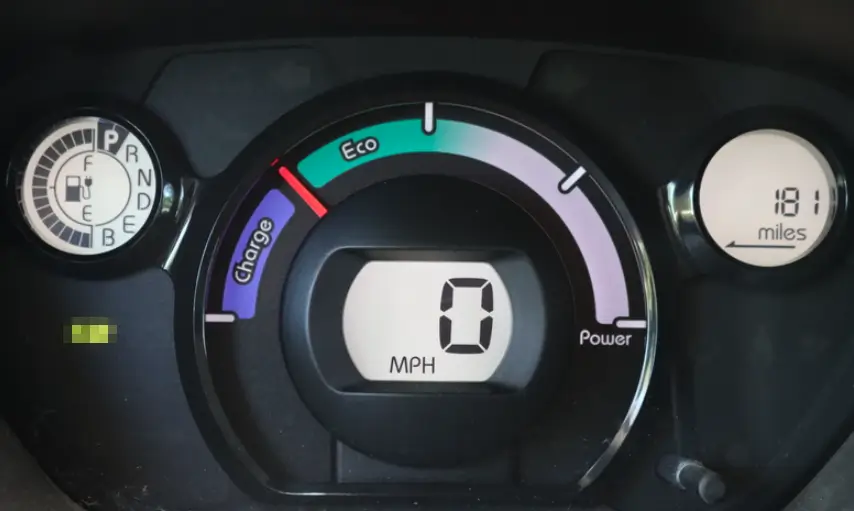
10.The vehicle's system now recognizes the expanded capacity of the upgraded battery pack and calculates the remaining range accordingly.
Welcome to contact us:
WhatsApp/Wechat/Mobile: +86 13332949210
Email: info@xihobattery.com
Website: www.xihobattery.com


